STM32F4 SDIO with DMA tutorial
Posted on October 10, 2018 at 12:14 PM
This guide will illustrate using the NUCLEO-F446RE SDIO with DMA and ChanFS. CubeMX is used to generate the project files. It aims to fill the gap between the manuals on the HAL drivers, the STM32F4 referece manual and the CubeMX cnfiguration boxes.
Summary
The document will follow the steps for configuring the NUCLEO-F446RE and setting up the project to:
- use SD card to read and write files
- use DMA FatFS template
The steps are:
- configure the GPIO
- configure the SDIO clock, 48Mhz, or 24MHz
- configure FatFS
- configure SDIO including NVIC and GPIO pullup on CMD and Data (if not using external pullup)
- changes to the template code to suit the SD present pin (depending on your hardware)
The hardware
This project will use a Nucleo baord, with the STM32F446re chip.
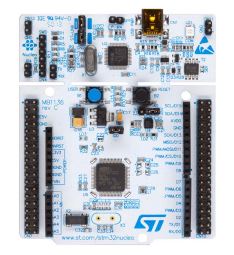 Nucleo64 - image from ST
The STM32F446re datasheet tells us The Secure digital input/output interface (SDIO):
- Supports MultiMediaCard SystemSpecification Version 4.2 in three different databus modes: 1-bit (default), 4-bit and 8-bit. The interface allows data transfer at up to 48 MHz, and is compliant with the SD Memory Card Specification Version 2.0.
- The SDIO Card Specification Version 2.0 is also supported with two different databus modes: 1-bit (default) and 4-bit.
- The current version supports only one SD/SDIO/MMC4.2 card at any one time and a stack of MMC4.1 or previous.
The nucleo donsn't have an SD so will need to add one. Options inlcude, Make your own board or buy a breakout.
Important points on hardware:
- The SD can consume as much at 150mA on write so make sure have power capacity.
- Pluging in an SD can cause voltage drop causing hard fault on the nucleo, make sure add a capacitor to ground.
- The SD data and CMD lines need pull up, so either add them to the baord or use the internal ones.
- microSDs don't have write protect.
- SD cards vary in performance, have few to test when debugging issues.
Setup project in CubeMX
Pinout
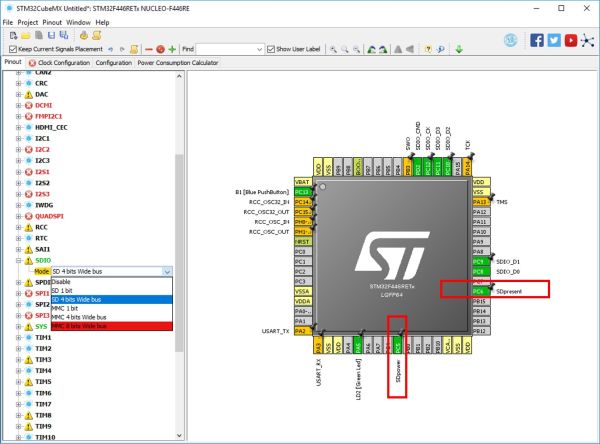 SDIO configuration
SDIO
In this section we choose the SDIO mode, 1-Bit or 4-Bit. Up to you based on the pins available. The generated code will check if the card can supprot 4-bit and revert to 1-bit if it cannot. Here I use 4-bit.
There are options on which pins you use for the SDIO interface, make sure you have it matchng your hardware/wiring. The above is the one I default to.
GPIO
Two additional GPIO are used in addition to the nucleos onboard led and push button.
- PC6 for SD present (SDpresent)
- PC5 for SD power enable (SDpower)
- PA5 nucleo LED2 (LD2)
- PC13 nucleo Push Button (B1)
The two additional GPIO are optional but nice to have. I use the SD present to see if there is a card and the SD power to turn on the SD when a card is inserted/removed. This was more a legacy solution from when I was having issues with power usage and MCU hard faults.
Clock Configuration
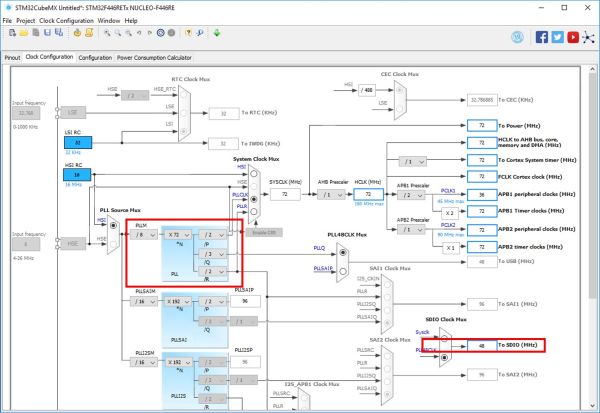 Clock configuration
Important the maximum SDIO clock is 48MHz. I have found that 24Mhz if often the most can run in 4bit mode. If your card fails to mount check the speed and also that have Data and Command lines as pull-up.
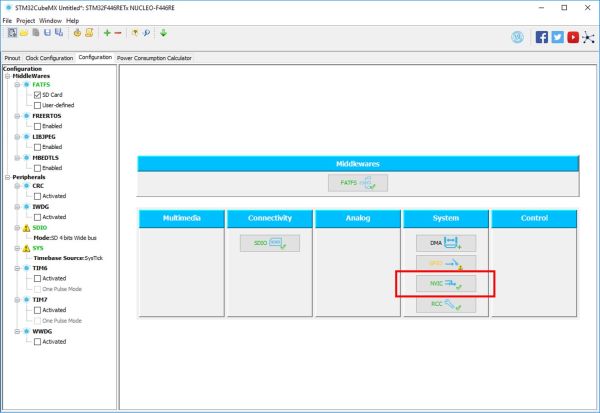
Configuration
Configue SDIO
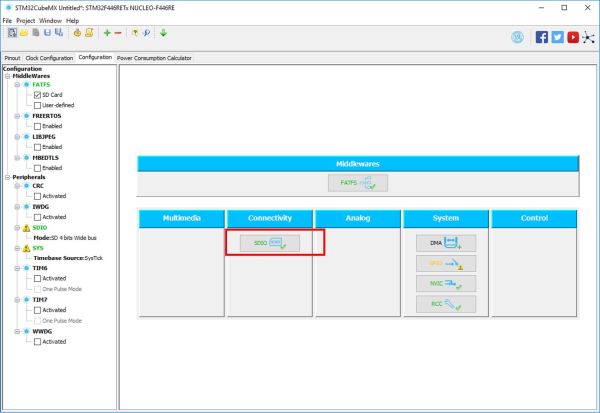 Select SDIO to edit configuration
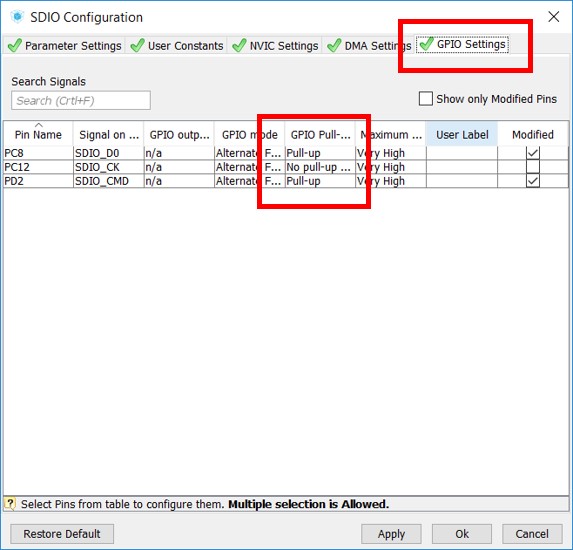 GPIO - set pull up on all but CLK (note shown in 1-bit)
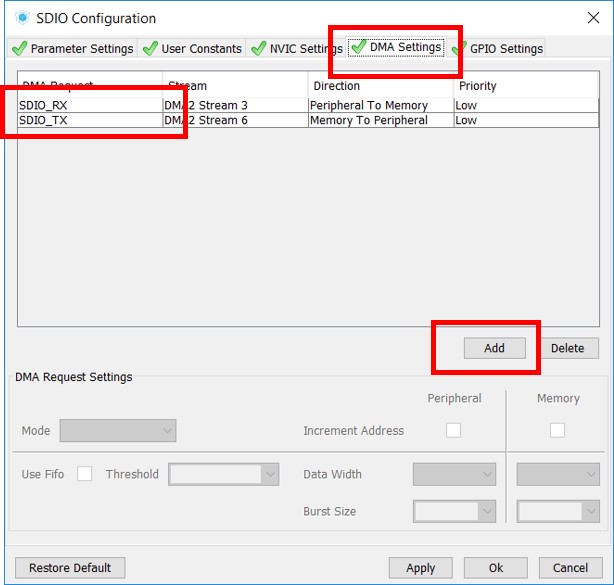 Add the DMA for Rx and Tx
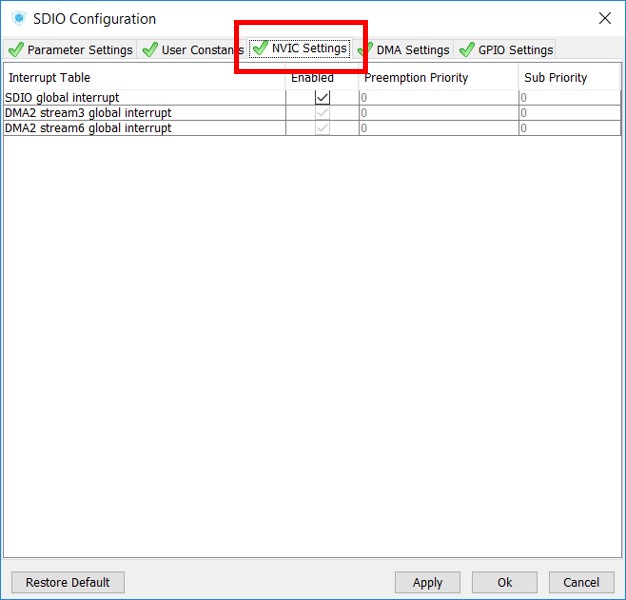 Set the NVIC
Configure NVIC
 Configure NVIC
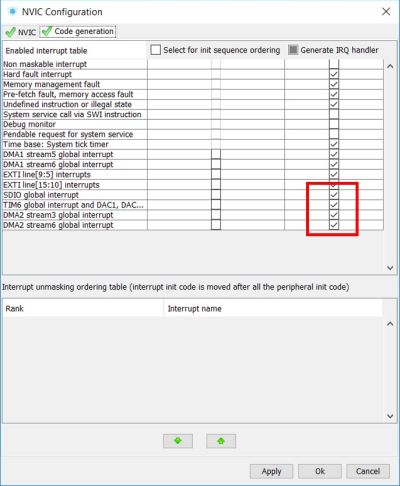 Set the NVIC code generation
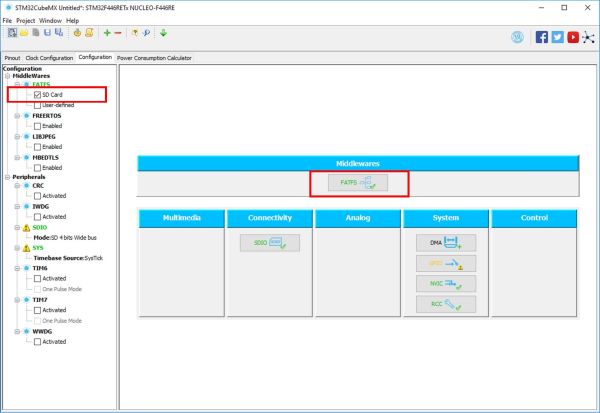
Configure FatFS
 Screenshot of FatFS configuration settings
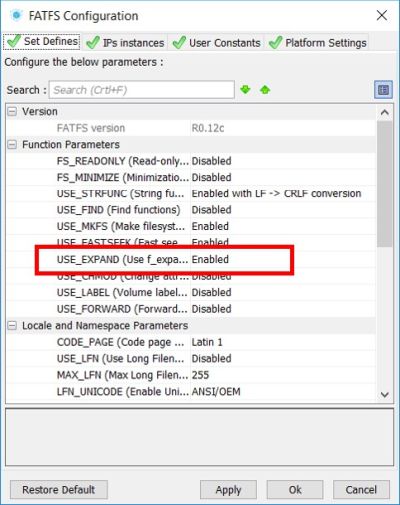 Defines for FatFS, I use expand, the rest are default.
Use expand is not needed for this example -- but I have left it here as a reminder -- it allows expanding a new file to a set a filesize and with continous blocks I can write driectly using low level access and not request the next block location each sector write. This allow me to speed things up significantly and with minimal effort but more on that anoter time.
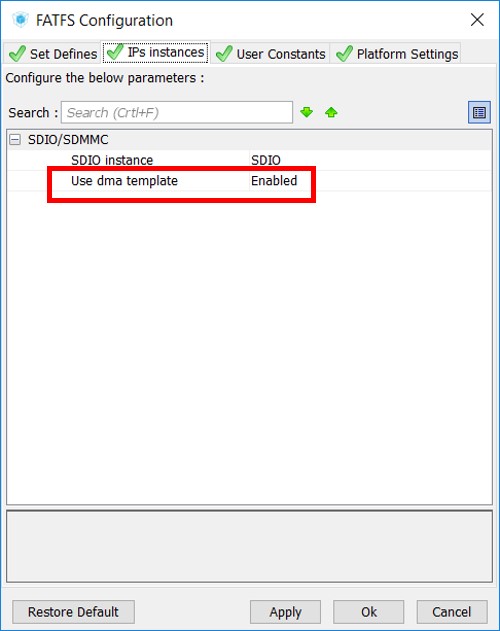 DMA template?
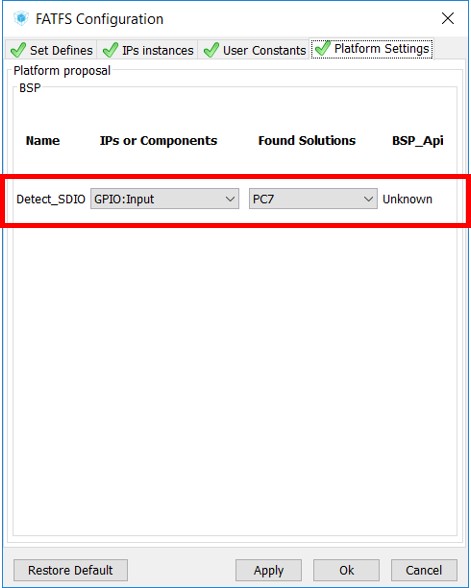 GPIO for SD present
Important point on SD present: FatFS has check box for SD present but only allows GPIO Input pins to be used... That is if you use a EXTI it will not allow you to select it which I think is a pain as I would like to run code when chip is removed or inserted. There are a number of ways around this:
- Don't use the input section and write code to handle it.
- Configure an additional GPIO with EXTI and connect externally to the SDpresent GPIO pin.
Complete the CubeMX generated code
To get it working
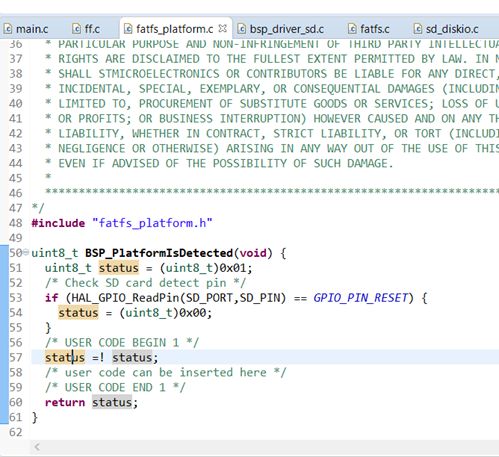
- Make changes to fatfs_platform.h to configure SDpresent
- Add the code to do something
The code configure SD present
As I have High when SD is present, I just add one line tp fatfs_platform.c
/* USER CODE BEGIN 1 */
status =! status;
 SD present change
The code to do something
The following code is basic test that
- Initialise the hardware
- Mount the SD file system
- Create and open and file
- Wrtie to the open file
- Close the file
/*## Initilise SD card hardware #################################*/
uint8_t mr = BSP_SD_Init();
if(mr != 0){
    //turn off SD
    while(1);
}
/*## Mount file system of the Initilised SD card #################################*/
FRESULT fr = f_mount(&SDFatFS, (TCHAR const*)SDPath, 0);
if(fr != FR_OK){
    //turn off SD
    while(1);
}
/*## Open and create a text file #################################*/
fr = f_open(&SDFile, "BoomLvL.txt", FA_WRITE | FA_CREATE_ALWAYS);
if (fr != FR_OK){
    while(1);
}
char data[] = "Verion2_dma\n\0";
UINT written;
UINT len = (UINT)strlen(data);
/*## Write data to the text file ################################*/
fr = f_write(&SDFile, &data[0],len, &written);
if (fr != FR_OK || written != len) {
    while(1);
}
/*## Close the open text file #################################*/
fr = f_close(&SDFile);

/*## Set the LD2 so know all good #################################*/
HAL_GPIO_WritePin(LD2_GPIO_Port, LD2_Pin, GPIO_PIN_SET);
The Output
Run your deugger and make sure get to the end.
If you want to do somehting real, like make a logger follow examples in Chan FatFS
Conclusion
The guide has stepped through the process of creating a project to set up the SDIO interface on a STM32F4. The SD interface of these low cost Nucleo baords have proven to be are very powerful and convenient for a number of my projects and hope this guide will help you to realse the same.
Any questions or suggestions feel free use the contact me.
Reference
The following are the documents referenced in this guide and the key documents for any project using this STM32L476 microprocessor.